Shopify Influencer Tracking: Everything You Need to Know
Does your brand have an online store? Are you using influencer marketing to drive awareness and sales? If so, you probably don’t need us to tell you how important it is to track the impact of your influencer campaigns.
The good news is, this is easily possible with the Storyclash Campaign Reporting. Read on to learn how to track conversions and sales metrics with discount codes as well as clicks based in Influencer Tracking Links from your influencer campaigns.
First, what is Shopify?
Shopify is a commerce platform that enables basically anyone to build an online store and accept payments online.
Millions of businesses use Shopify to sell their products digitally – from tiny mom-and-pop operations to multinational retailers. In fact, approx 10% of online stores worldwide run on Shopify, and in the U.S., it’s significantly higher at 28%.
What is Shopify Connect?
Shopify Connect is the Shopify integration from Storyclash, the leading influencer marketing platform. It enables you to link your Shopify store to your Storyclash account.
Let’s say you’re a direct-to-consumer (DTC) fashion brand. Your main sales channel is your website, which uses Shopify technology to manage orders. You work with influencers on Instagram and TikTok to promote your clothing range.
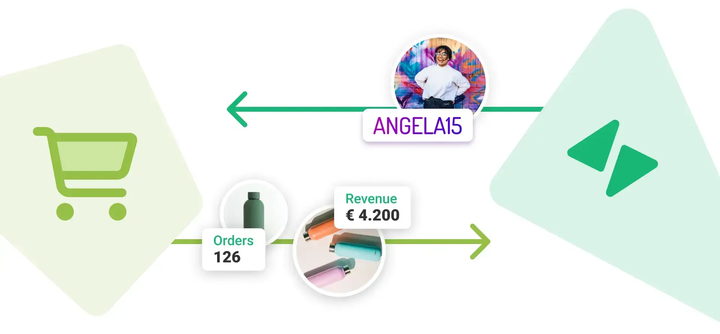
Influencers share promotion codes with their audience, offering a 10% discount on selected items. Storyclash tracks these promotion codes to measure revenue and other sales-based KPIs (like Return on Advertising Spend, or ROAS).
This information enables you to attribute sales to creators and posts. So you can assess which partnerships are the most valuable, and what kind of content resonates with your customers.
How to track Shopify influencer conversions
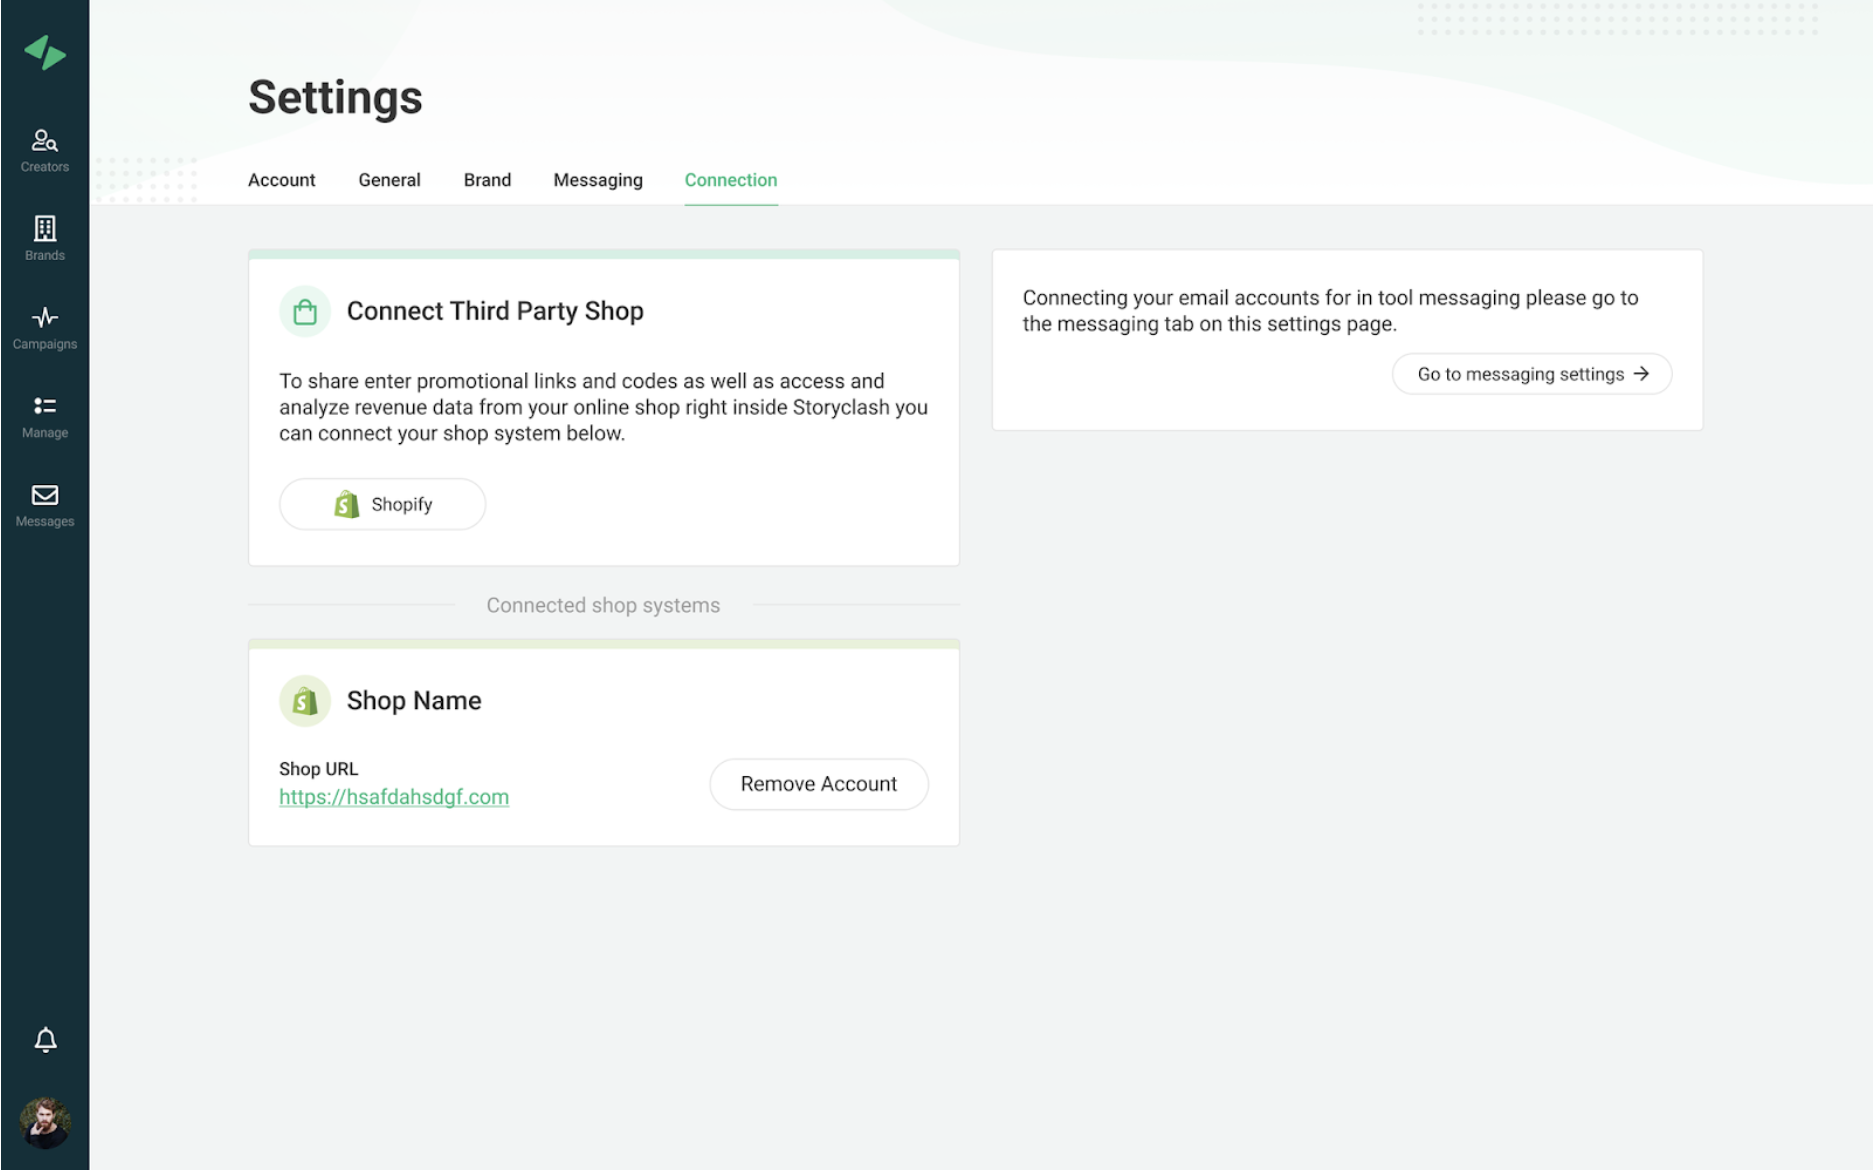
First, your Shopify store needs to be connected with Storyclash. If you’re a Storyclash customer, reach out and we’ll let you know how to set it up.
To check if your Storyclash account is connected, open Settings. If you can see Shopify and your shop name, you’re in good shape.
Next, it’s time to set up influencer codes for your campaigns. You’ll need to create a new campaign (or open an existing one).
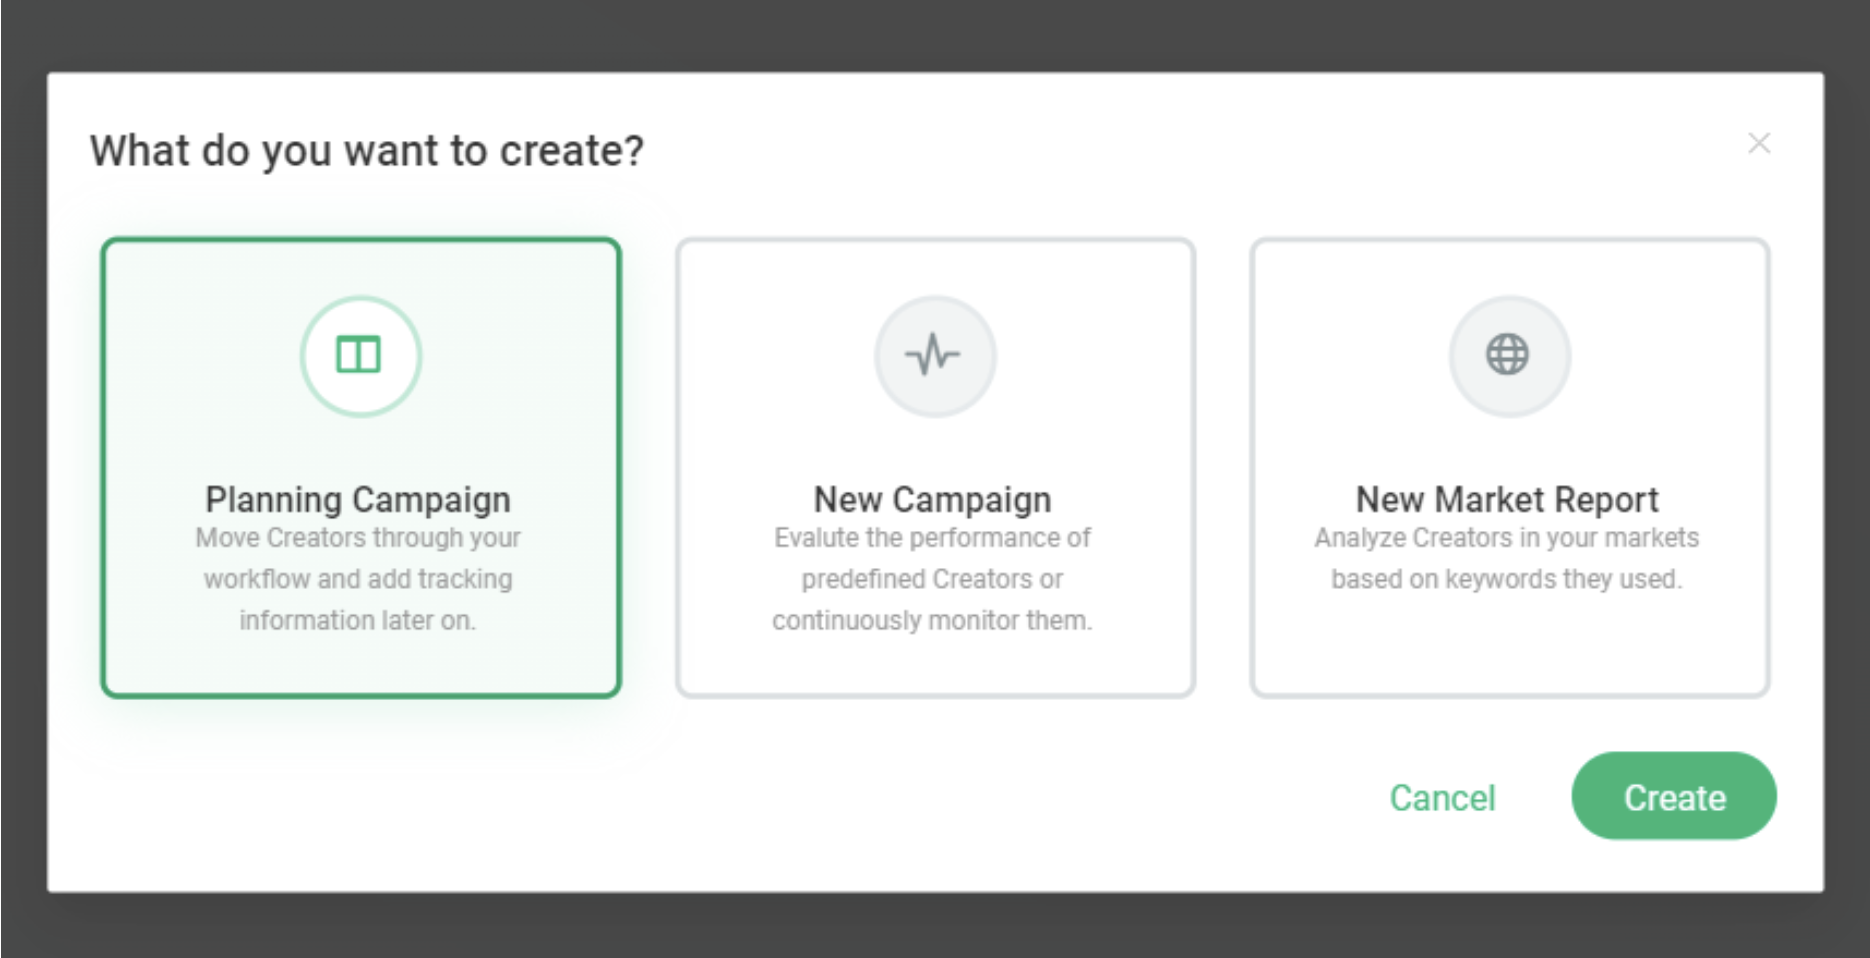
Log in to Storyclash and open the “Campaigns” tab. Open an existing campaign. Or click “Create new campaign or report,” then select “Planning campaign” and click “Create.”
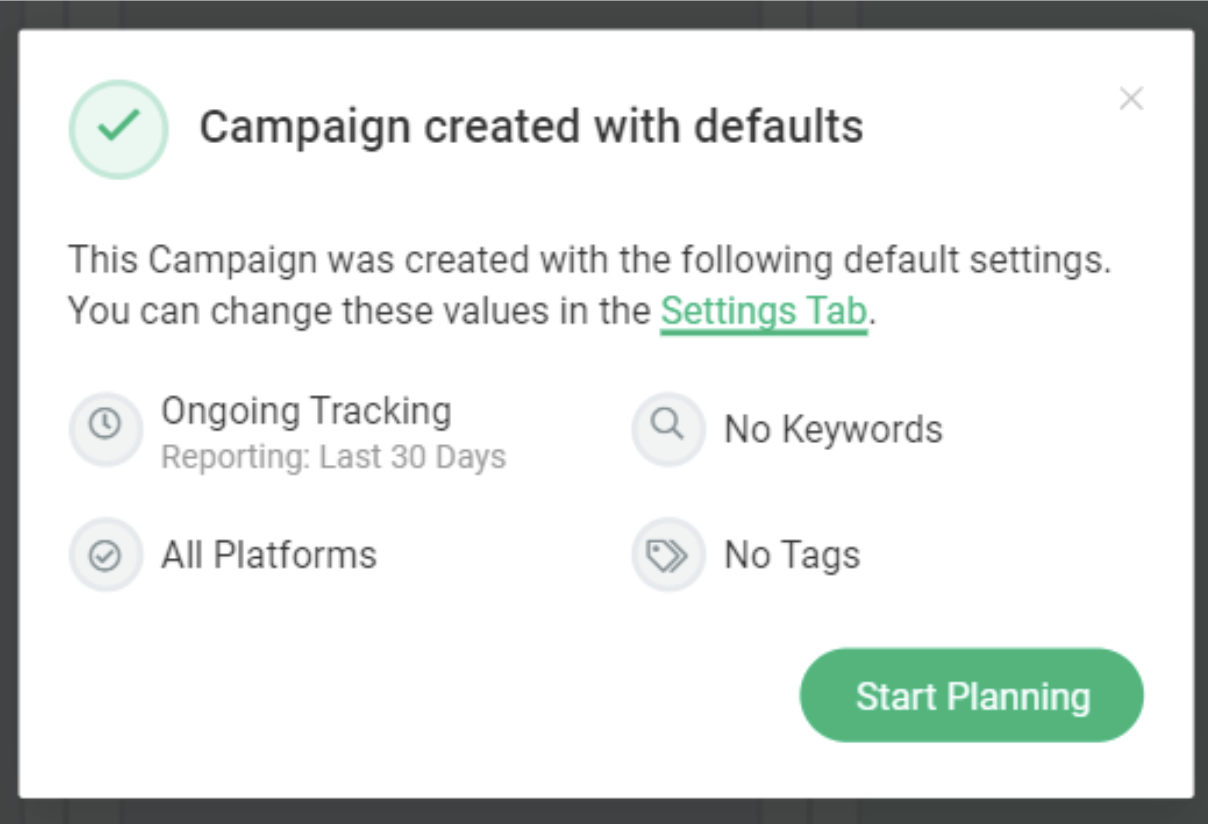
Next, hit “Start planning.”
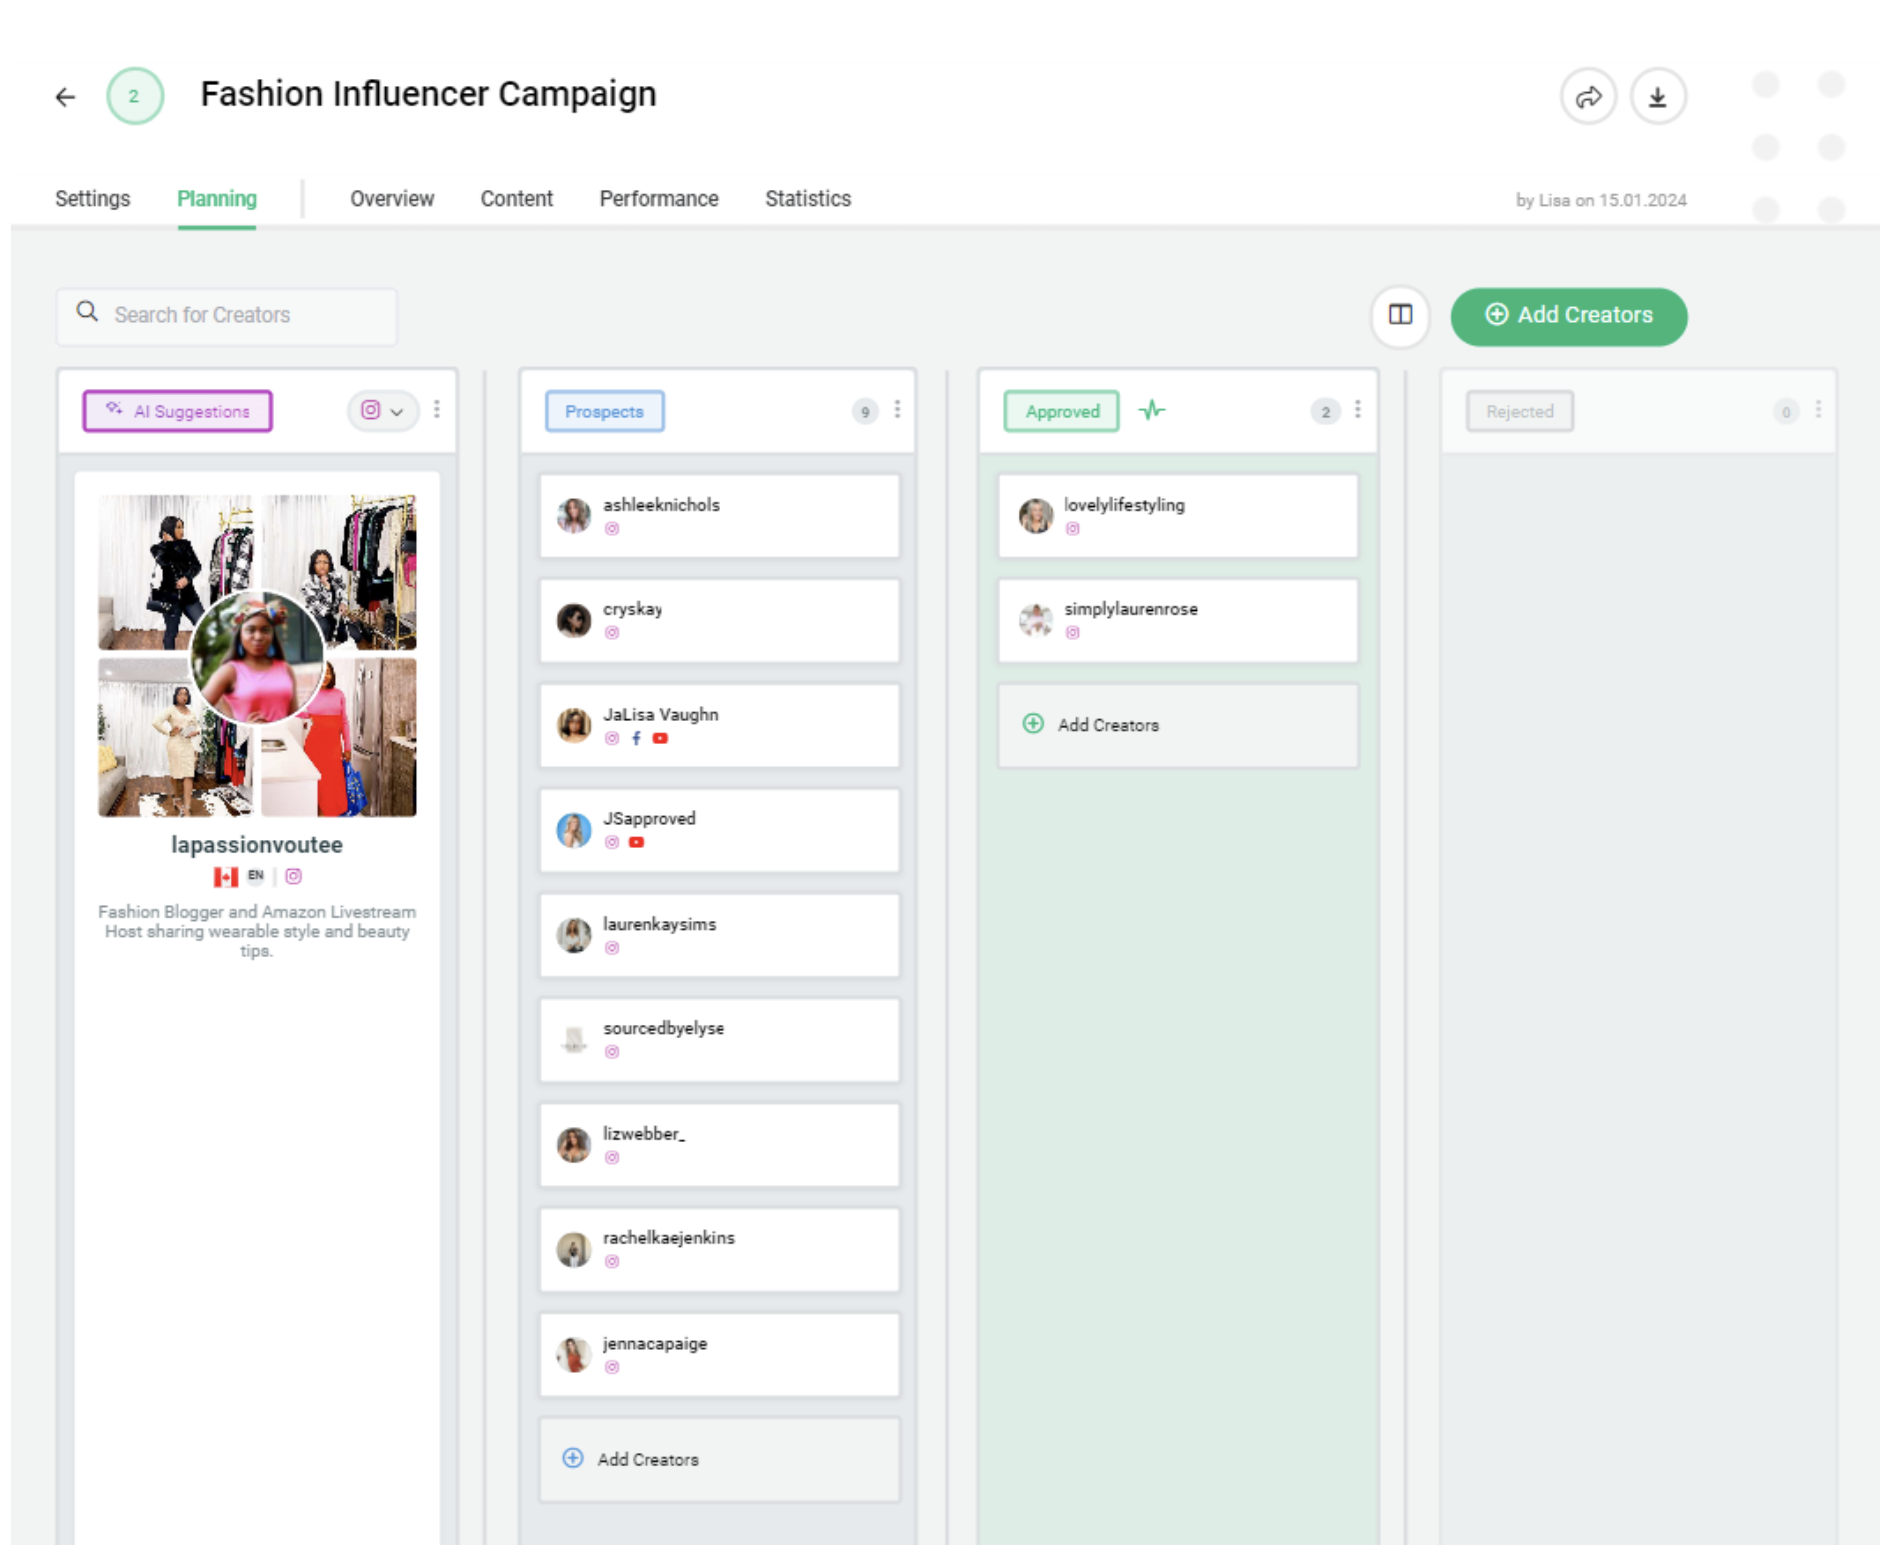
You’ll see an overview of your campaign. In the planning tab, click “Add Creators” to import creators from a list, or drag-and-drop AI suggestions from the column on the left.
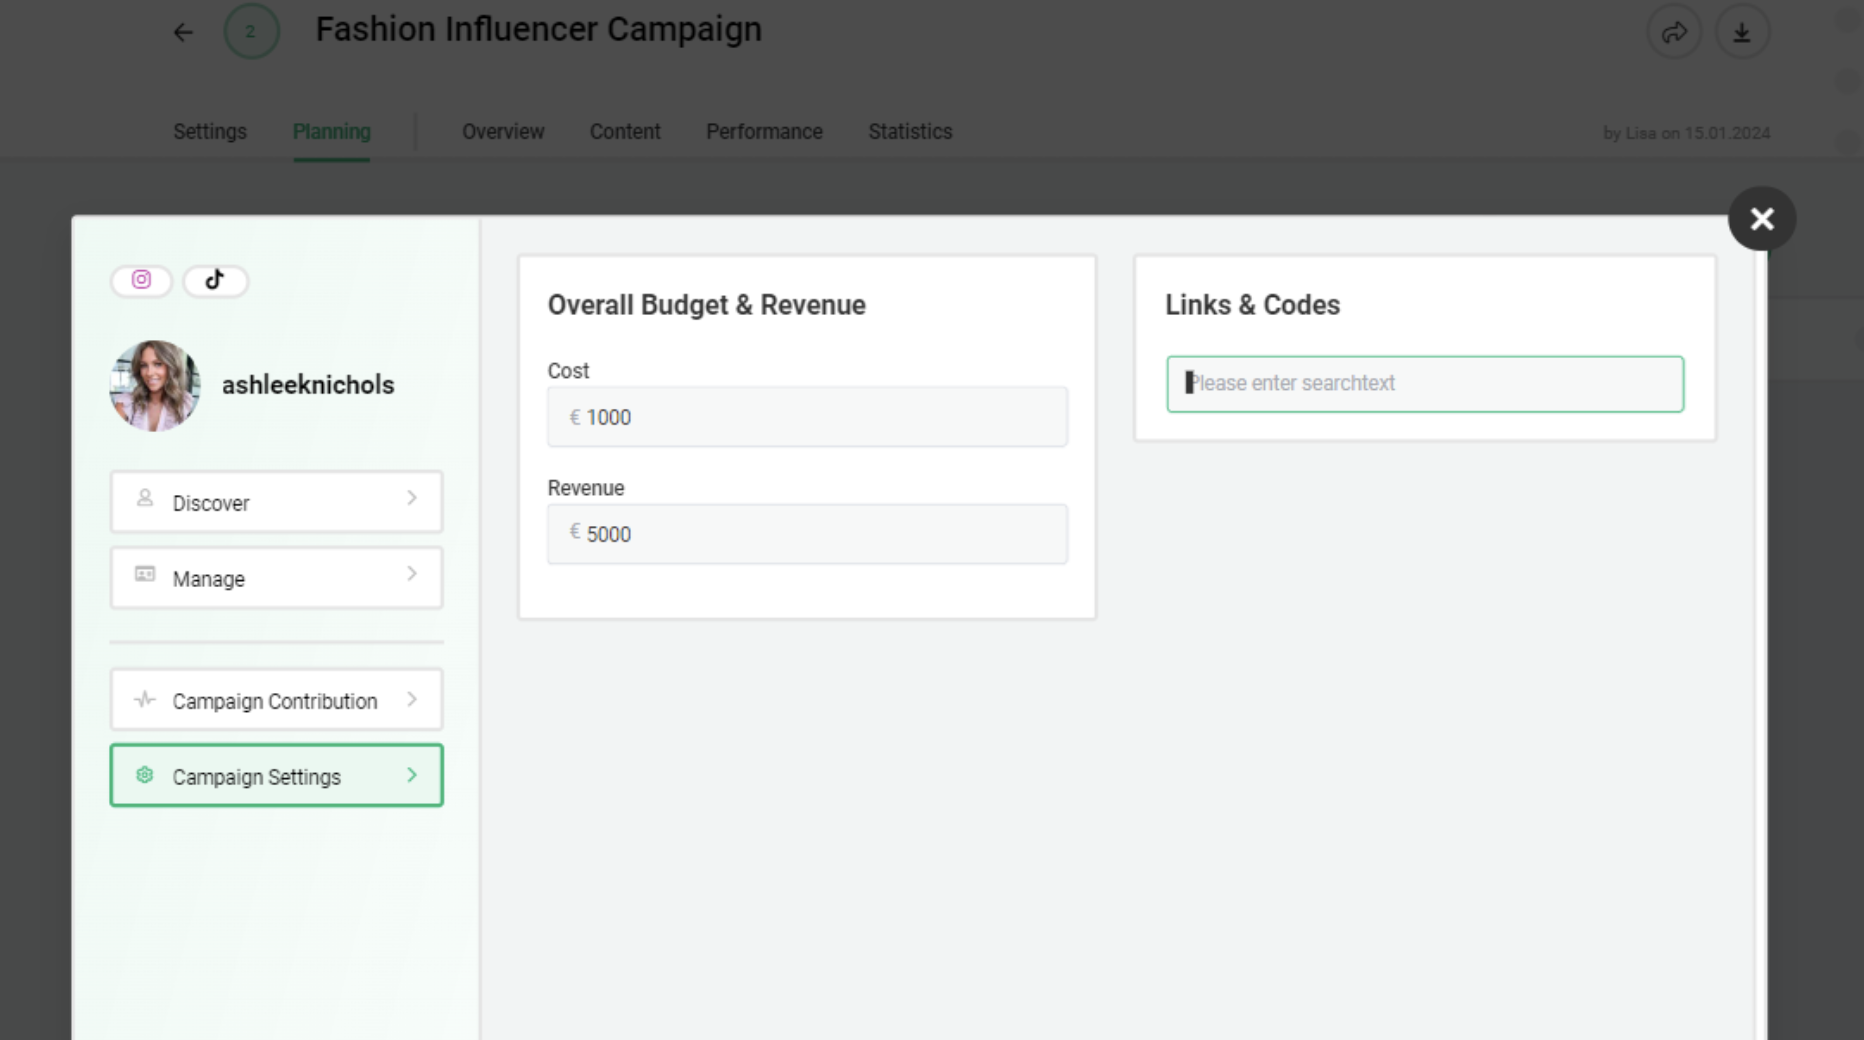
To measure influencer performance, you need to add a code for each influencer. To do that, click on the profile of an influencer. Then click “Campaign settings.”
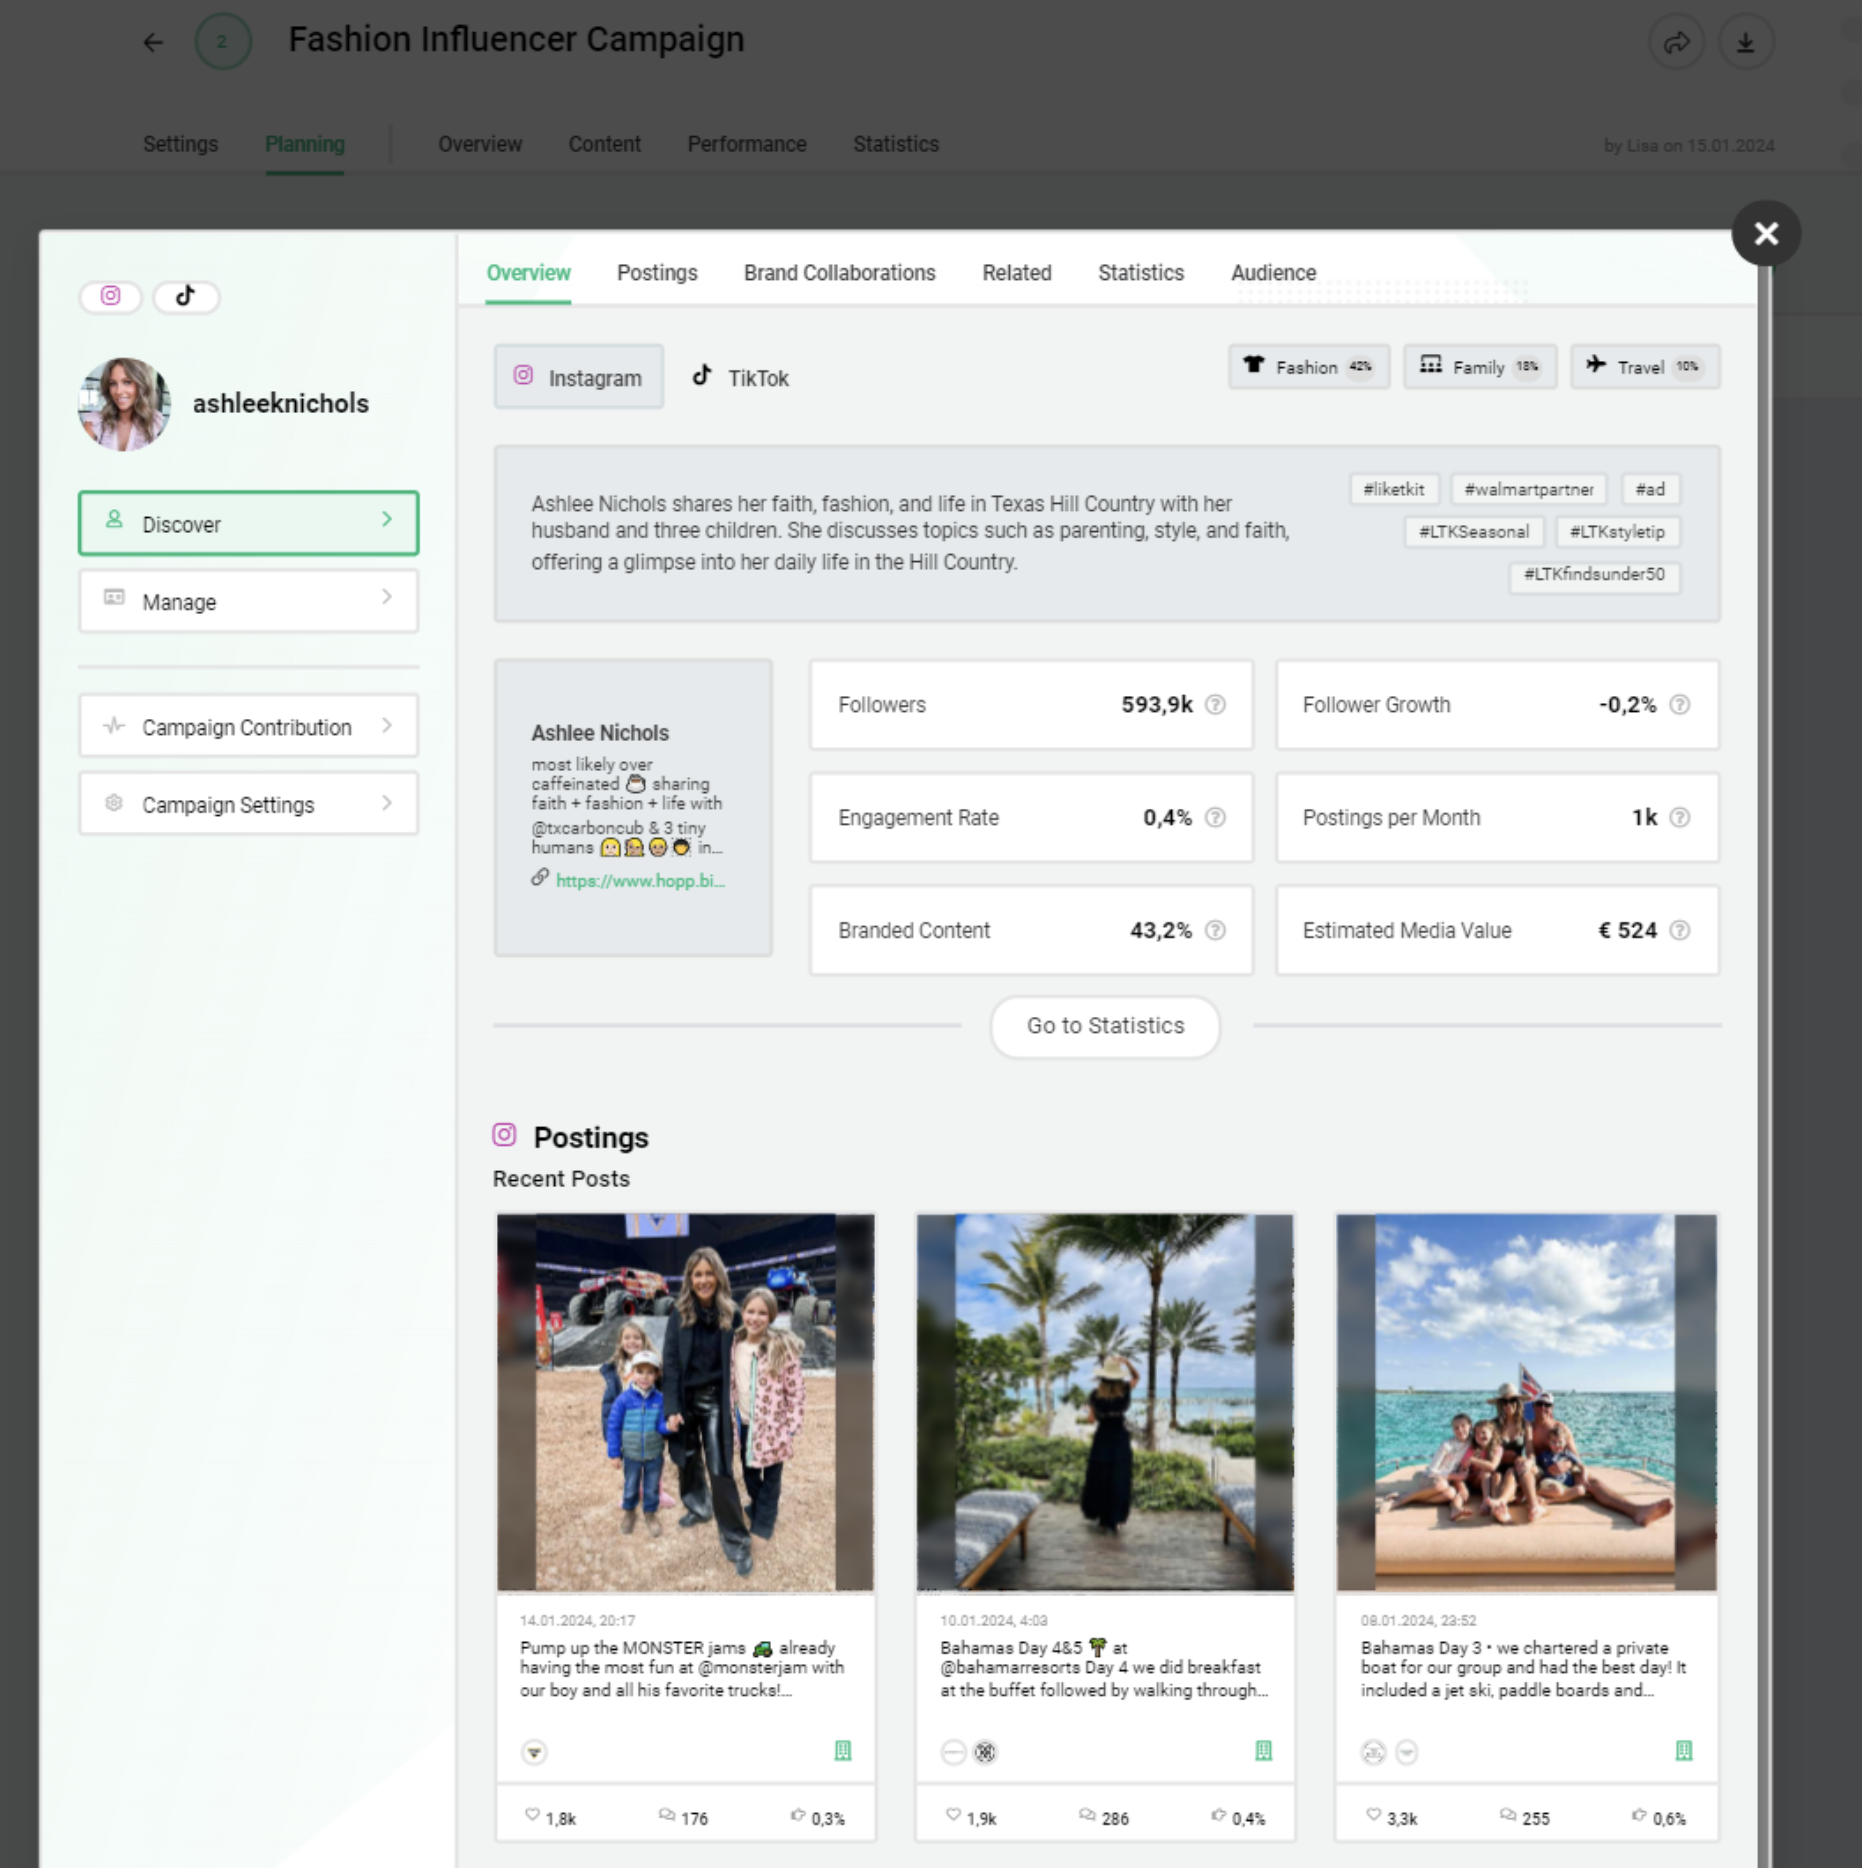
Here, you can enter the code – like say, ASHLEE10. So every time a user redeems that code, you’ll know it was Ashlee who drove the sale. You can also enter the cost so Storyclash can calculate the return on advertising spend for you.
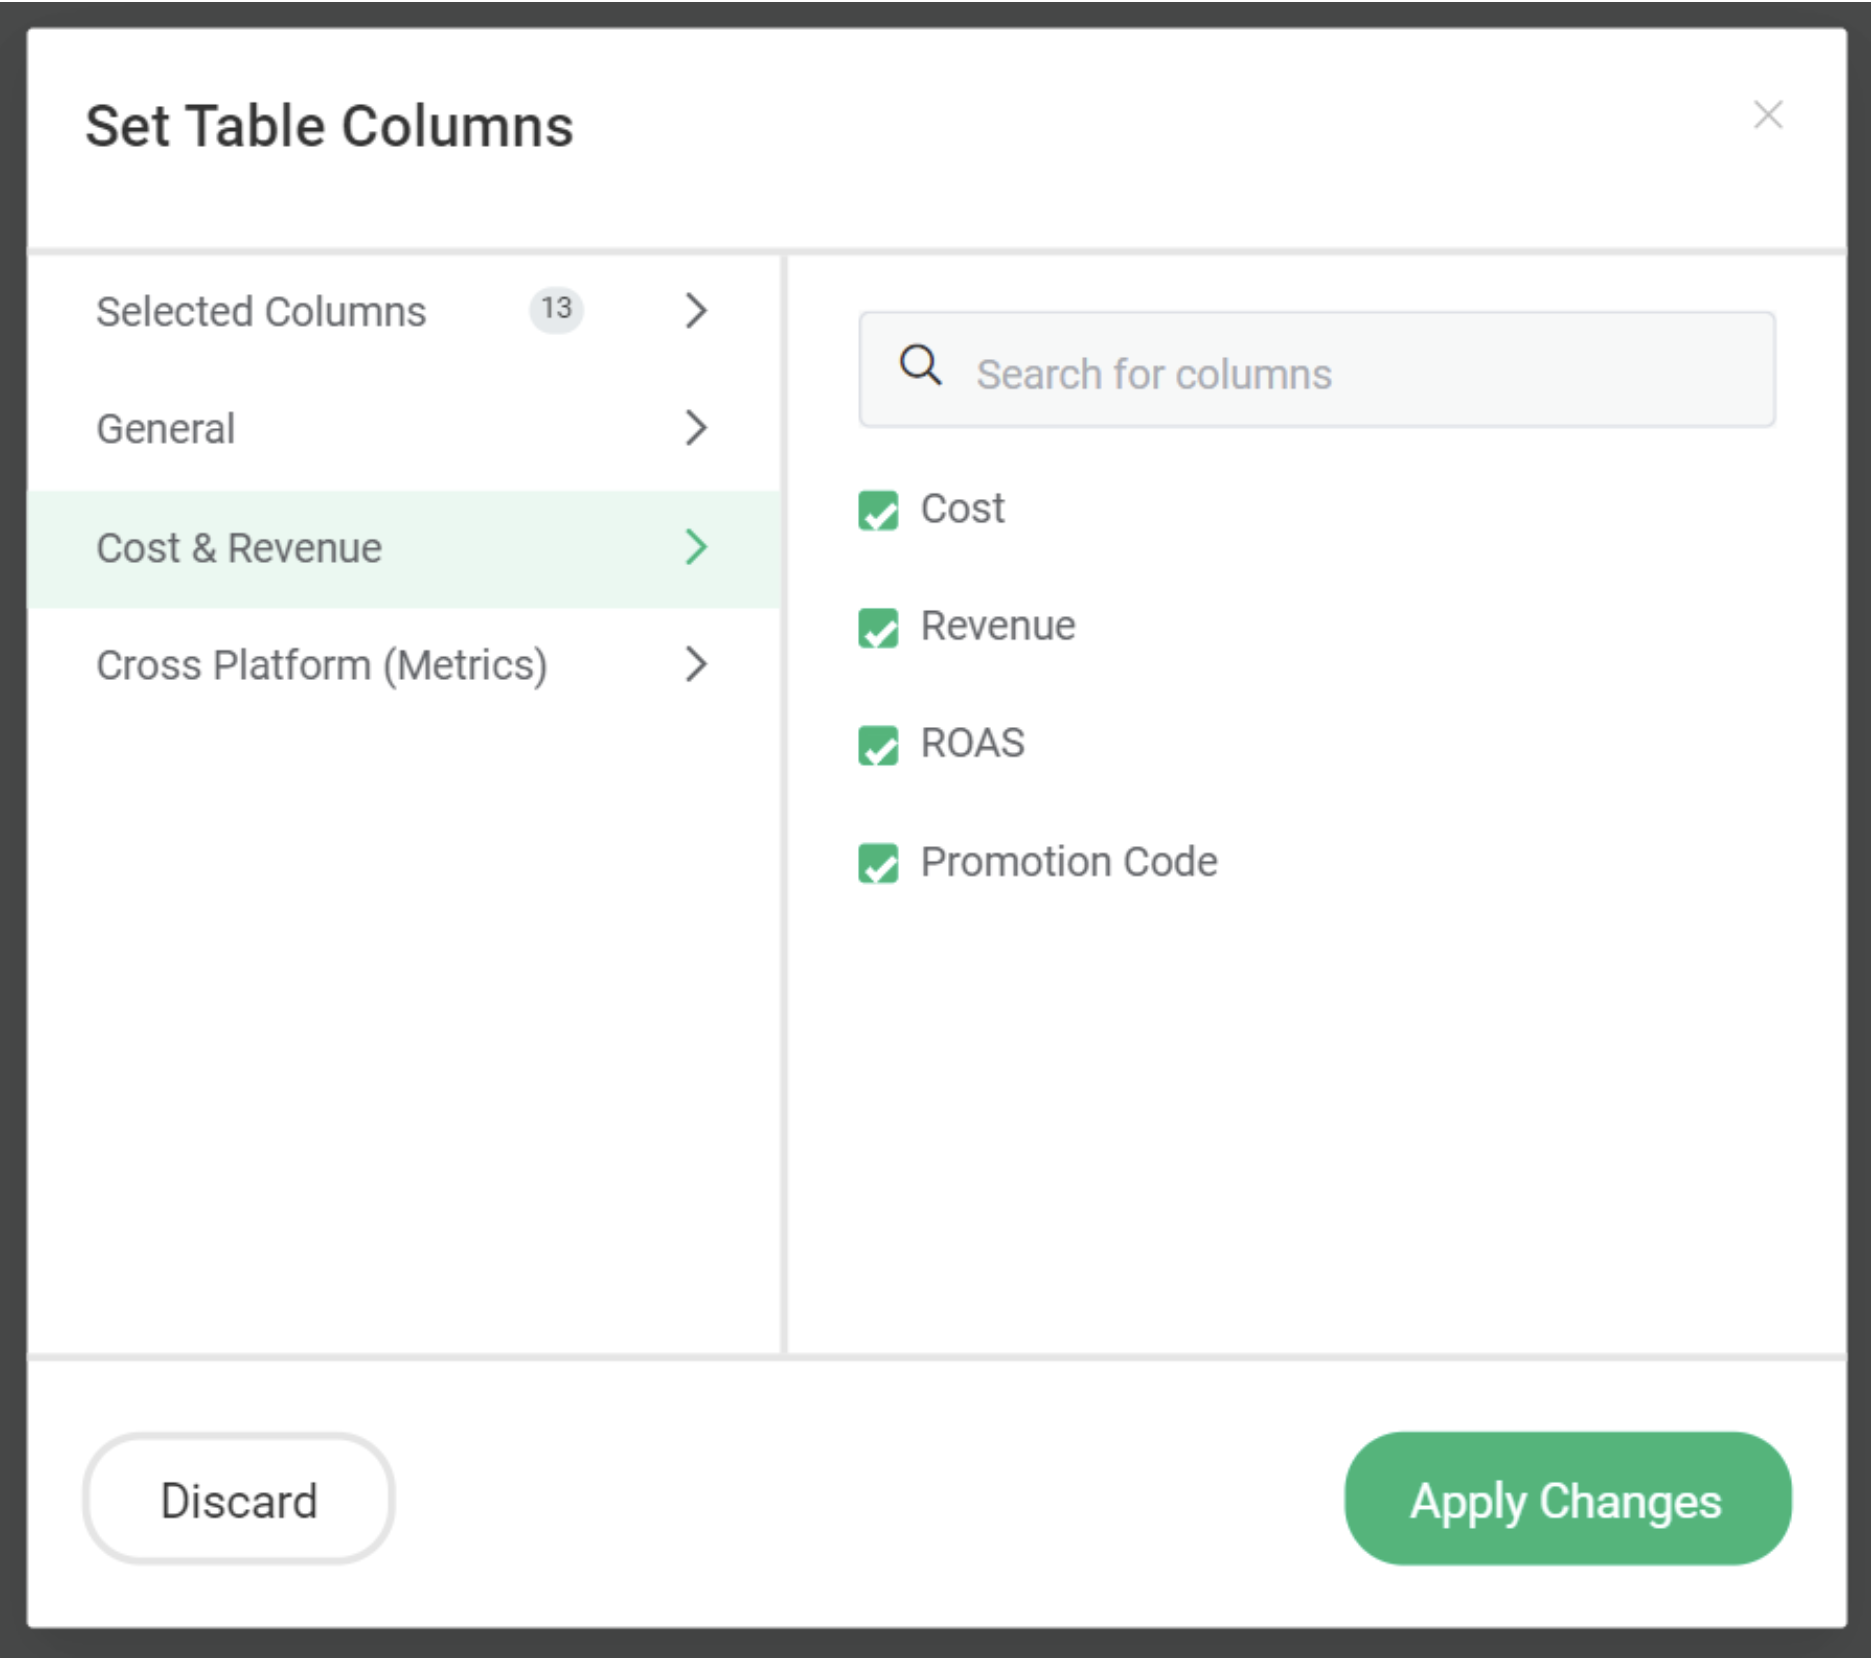
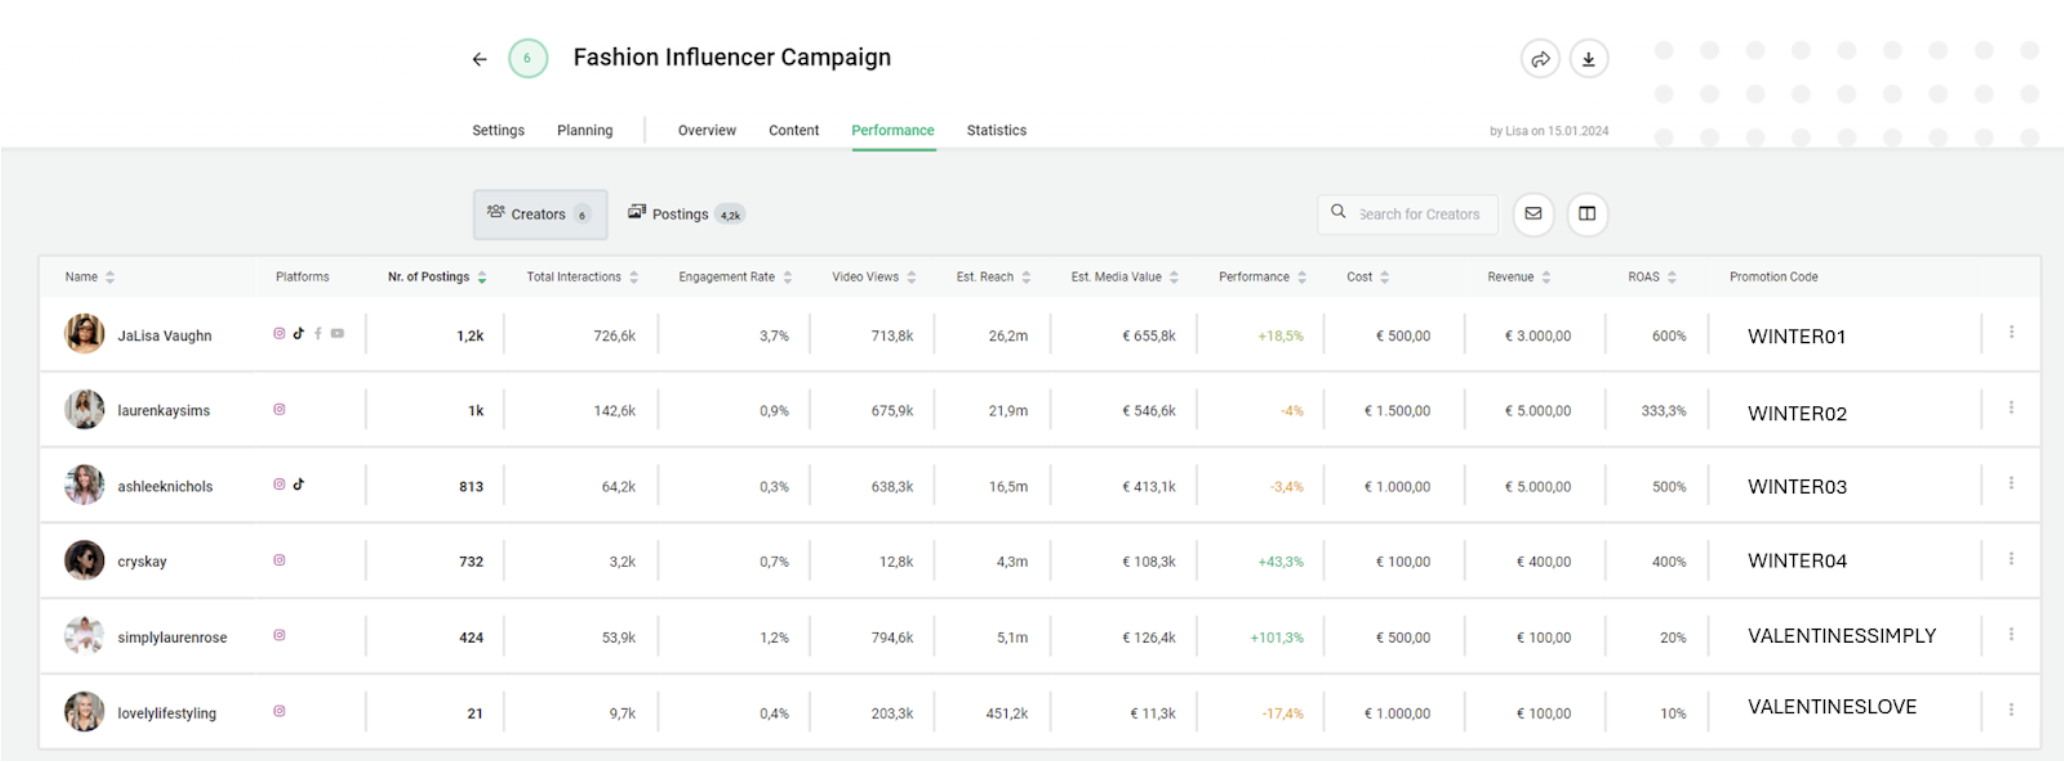
Want to do this for more than one creator at once? Open the “Performance” tab. To see the relevant columns, open the column selector and ensure Cost, Revenue, ROAS and Promotion Code are checked.
You’ll see an overview of all the influencers involved in your campaign. You can add codes here, and track the performance anytime by looking at the figures in the Revenue column. To see the Return on Advertising Spend (ROAS), you’ll need to add in the costs – and Storyclash works out the rest.
Ready to track the impact of influencer campaigns on sales?
Already a Storyclash customer? Awesome – get in touch and we’ll let you know how to link your Shopify store to your Storyclash account. If you haven’t tried Storyclash yet, book a demo to see our platform in action, or learn more about influencer reporting.